If you’re considering becoming an Amazon seller, you’re making an excellent decision. Selling on Amazon offers endless opportunities for growth and financial freedom. This guide will walk you through everything you need to know to create an Amazon seller account in 2025. Let’s begin!
Why Sell on Amazon in 2025?
Amazon continues to dominate the e-commerce world. With over 300 million active customers worldwide, it’s the go-to platform for online shopping. Here’s why 2025 is the perfect year to start:
- Global Reach: Amazon operates in over 20 countries, giving you access to a global audience.
- Proven Success: New sellers earn an average of $30,000 annually in their first year.
- Advanced Tools: Amazon offers powerful tools to help sellers manage inventory, track sales, and market their products.
- Ease of Use: With Fulfillment by Amazon (FBA), you can let Amazon handle storage, shipping, and customer service.
Selling on Amazon isn’t just about making money; it’s about building a scalable and sustainable business.
1. Visit Amazon Seller Central and Sign Up

The first step is to visit the Amazon Seller Central website. This platform is the hub for all your Amazon selling activities. When you arrive, click the “Sign Up” button. You’ll find it right at the top of the page.
Amazon offers two selling plans: Individual and Professional.
- The Individual plan is best for sellers with fewer products. There is no monthly fee, but Amazon charges per sale.
- The Professional plan is for those selling more products and includes advanced features. Choose the plan that suits your business. If unsure, you can always upgrade later.
When you click “Sign Up,” you’ll be redirected to a login page. Here, you can log in with your existing Amazon account or create a new one. If you’re new, select “Create Your Amazon Account.” You’ll need to provide your name, email address, and password.
2. Verify Your Email Address
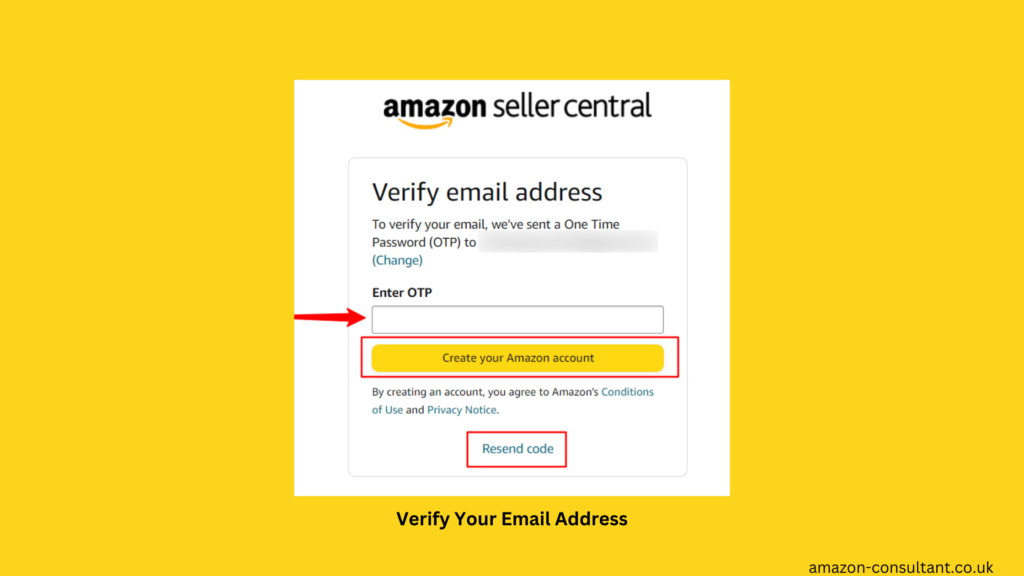
After signing up, Amazon will send a verification email to the address you provided. This email contains a code. Check your inbox, copy the code, and enter it on the Amazon verification page. Once verified, Amazon will guide you to the next step.
This verification ensures your email is valid. Amazon uses your email for important updates. Be sure to provide an active email address you check often. If you don’t see the email, check your spam folder. Verifying your email is quick and takes less than a minute.
3. Select Your Business Location and Type
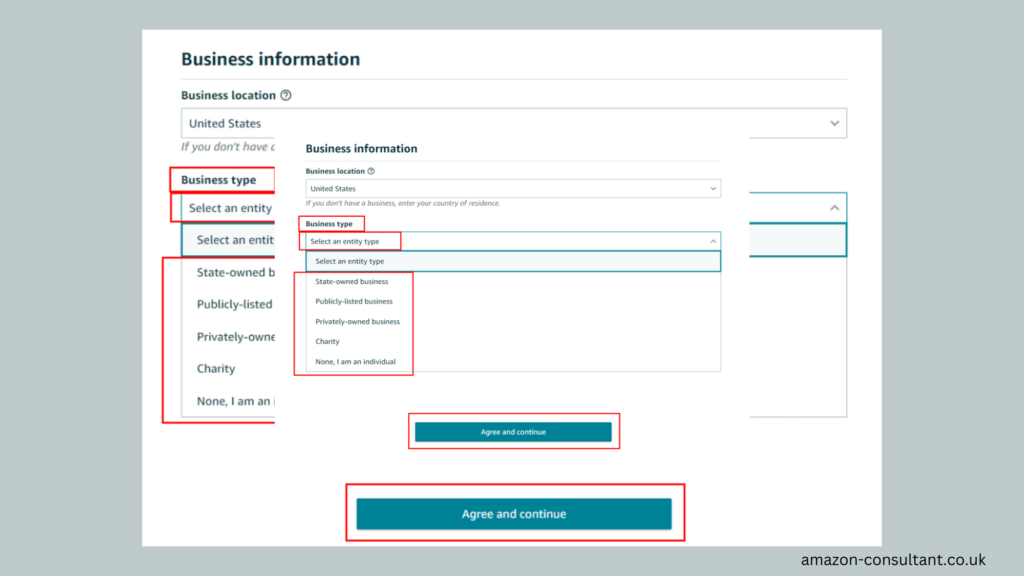
Next, Amazon will ask for your business location and type. Your business location refers to the country where your business operates.For example, select the USA if you’re based in the United States. Amazon needs this to comply with regional laws.
You’ll also need to select your business type. Options include:
- State-owned business
- Publicly-owned business
- Privately-owned business
- Charity
- None (Individual)
Most sellers choose the privately owned business option. If you’re not running a registered business, select “None, I am an individual.”Be honest when choosing your type and location. Amazon may verify this information later. Providing accurate details ensures a smoother account setup process.
4. Enter Personal and Billing Information
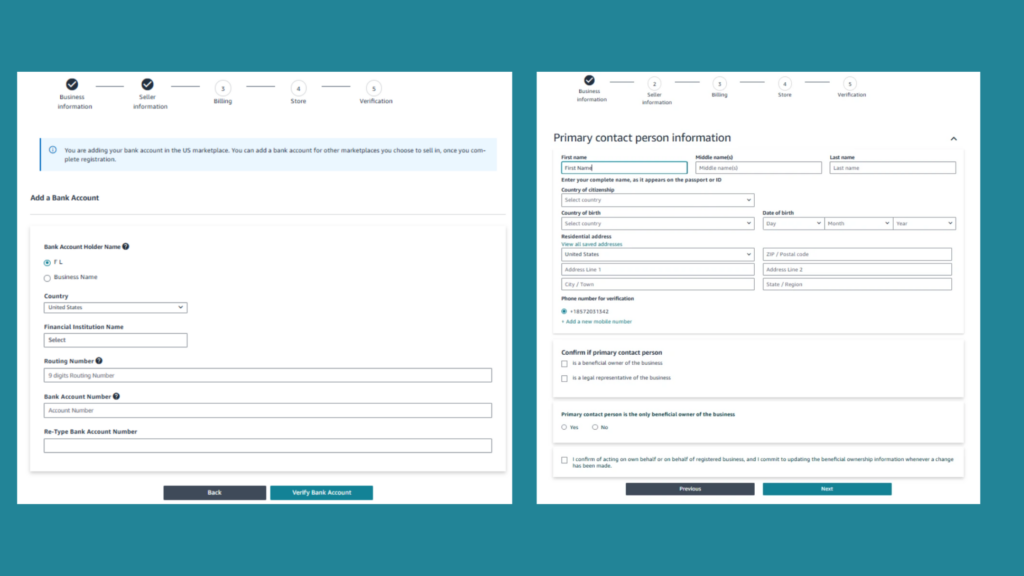
Amazon requires your personal and billing information to verify your identity. Start by entering your Full Name, Address, and Phone Number. Amazon will send a text or call to verify your phone number. Enter the PIN code Amazon provides to complete this step.
Next, provide your banking details. Amazon uses this account to deposit your earnings. Ensure the account matches the name or business you registered. You’ll also need a valid credit card for any selling fees.
Double-check your details for accuracy. Mistakes can delay your account approval. If Amazon needs further verification, they’ll ask for documents like a bank statement. Have these ready to avoid delays. After verifying your details, it’s time to provide information about your products and store.
First, choose a name for your Amazon store. This name will be visible to customers. Pick something professional and relevant to your niche. Don’t worry—you can change this name later if needed.
Amazon will also ask if you own UPCs or are the product manufacturer. If you plan to sell branded items, you’ll need to prove you’re authorized.
Amazon supports sellers with certifications like the Amazon Brand Registry. Next, share a brief description of your products. Mention what you plan to sell and any unique features. This helps Amazon understand your business better.
6. Verify Your Identity
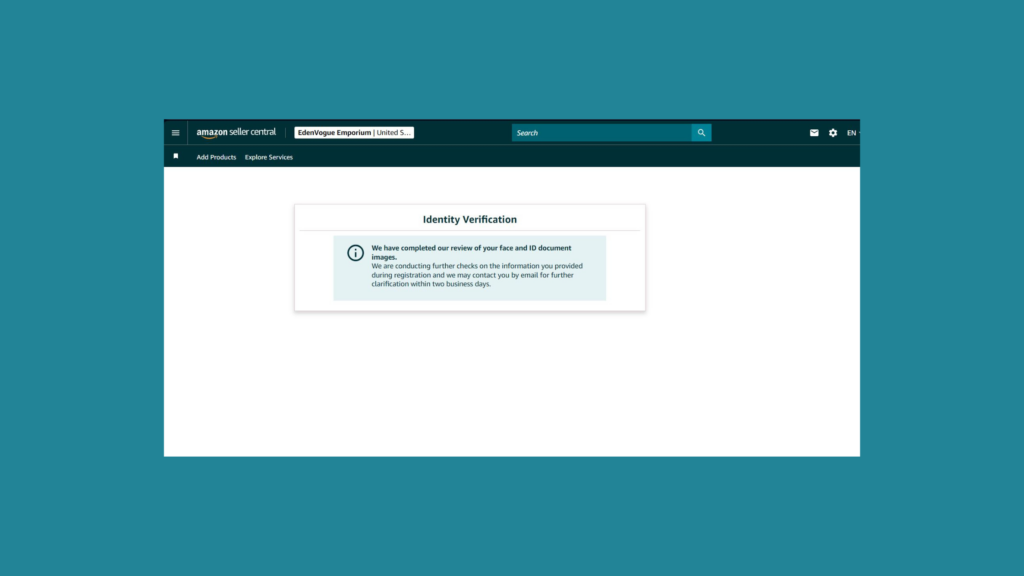
Identity verification is the final and most critical step. Amazon takes seller security seriously. To verify, you’ll need the following
- A valid government-issued ID (passport or driver’s license)
- A recent bank statement matching your provided details
- A device with a camera for a live video call
Upload the required documents through Amazon’s secure portal. After submission, schedule a video call with an Amazon associate. During the call, they’ll review your documents and confirm your identity. This step ensures marketplace safety for all users. Once verified, Amazon will activate your seller account. Congratulations—you’re ready to start selling!
Additional Tips for Creating a Successful Amazon Business
Creating an account is just the beginning. Building a successful Amazon business requires smart planning and effort. Use these tips to set yourself apart.
1: Research Your Products Thoroughly
Product research is the foundation of your business. Selling a product with high demand and low competition increases your chances of success. Tools like Helium 10 Black Box can simplify the process. Look for products with:
- High demand
- Low competition
- Good profit margins
- High-quality materials
Research customer reviews of similar products. Identify gaps in the market. Offer something better to attract buyers. A winning product sets the stage for a profitable business.
2: Register for the Amazon Brand Registry
The Amazon Brand Registry offers exclusive tools for brand owners. It helps you protect your brand and create engaging listings. Benefits include:
- A+ Content: Enhanced images and descriptions to boost conversions.
- Amazon Vine Program: Get reviews quickly by sending products to trusted testers.
- Branded Storefront: Showcase your products in a professional store.
- Brand Analytics: Access insights to improve your strategy.
Registering your brand helps you stand out. Buyers trust branded products more. Take advantage of these tools to grow your business.
3: Use Amazon PPC Ads to Drive Sales
Amazon’s Pay-Per-Click (PPC) ads are a powerful way to boost visibility. These ads place your products at the top of search results. PPC campaigns can drive immediate traffic to your listings. Start with a small budget. Test different keywords and ad formats.
Use Amazon’s ad reports to analyze performance. Focus on high-performing keywords to maximize your return on investment. PPC ads can accelerate your sales and help you rank organically.
4: Maintain High-Quality Standards
Customer satisfaction is key to long-term success. Offer high-quality products that exceed expectations. Poor reviews hurt your sales and search ranking. Before launching, test your product’s durability and performance.
Communicate with suppliers to ensure consistent quality. Inspect shipments before listing products. Delivering reliable products builds trust and encourages repeat purchases.
5: Optimize Your Listings
An optimized product listing attracts more customers. Follow these tips for better results:
- Use a descriptive title with relevant keywords.
- Include high-resolution images showing different angles.
- Write bullet points highlighting product features and benefits.
- Add a detailed description answering common customer questions.
Regularly update your listings based on customer feedback. Optimization improves search rankings and conversions.
6: Leverage Amazon’s Fulfillment Services
Amazon offers two fulfilment options: Fulfillment by Amazon (FBA) and Fulfillment by Merchant (FBM).
- FBA handles storage, shipping, and customer service. It’s ideal for new sellers. Customers trust FBA products for faster delivery and easier returns.
- FBM allows you to manage fulfilment independently. It’s a good option if you already have a logistics setup. Choose the method that suits your business needs.
Conclusion
Creating an Amazon seller account in 2025 is the first step to starting a successful journey on the world’s largest e-commerce platform.
While the process may seem detailed, breaking it into manageable steps makes it easier. From signing up on Amazon Seller Central to verifying your identity, each stage is crucial for building a solid foundation for your business.
At Amazon Consultant, we understand that setting up and managing an Amazon seller account can feel overwhelming. That’s why we’re here to help! Our team of experts can guide you through every step, ensuring you avoid common mistakes and maximize your potential for success.
Whether you’re a beginner or a seasoned seller looking for professional assistance, Amazon Consultant is your trusted partner in navigating the complexities of Amazon. Get in touch today and let us help you achieve your e-commerce goals!
Here are some frequently asked questions
Some simple but important FAQs
How much does it cost to create an Amazon seller account?
Creating an account is free. However, you’ll need to choose between the Individual plan ($0.99 per sale) or the Professional plan ($39.99/month).
Do I need a business license to sell on Amazon?
You don’t need a business license to start. However, having one can simplify processes like tax registration and brand protection.
Can I sell on Amazon without UPC codes?
Yes, you can apply for a GTIN exemption if your products don’t have UPC codes.
How long does account approval take?
Approval usually takes 3-5 business days. Delays can occur if additional verification is needed.
What is the Amazon Seller App?
The Amazon Seller App helps you manage your store on the go. You can track sales, update listings, and respond to customer messages easily.
Leave a Reply